
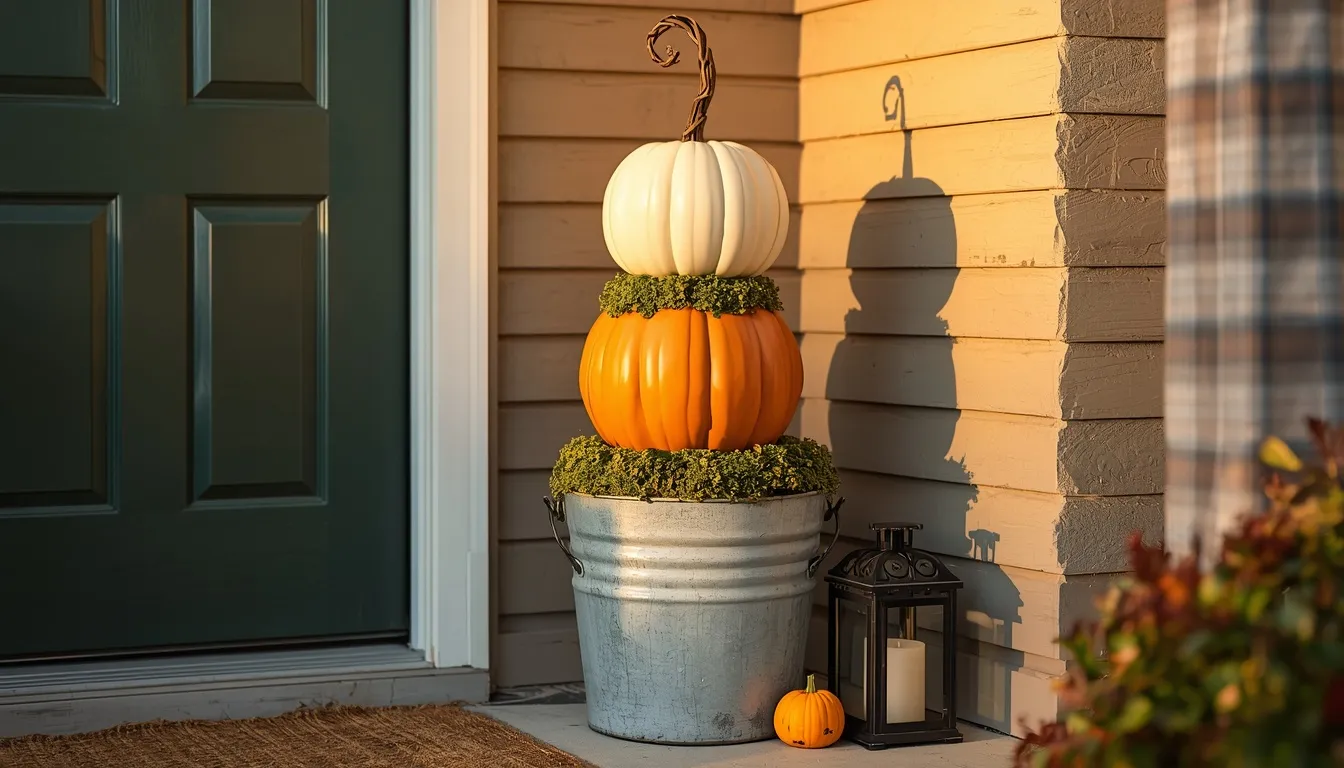
spends the next eleven months stuffed in a closet. These plastic pumpkin bucket DIY ideas give it a second life as decor you will actually want to leave out.
It makes sense, too. Real pumpkins soften within a few weeks, and store bought fall decor adds up fast. A plastic bucket costs very little, never rots, and takes paint, fabric, and rope surprisingly well once you prep it.
Below you will find the few supplies most projects share, then fifteen makeovers that go from rustic burlap to glam black and gold. Some take ten minutes, a couple need an afternoon, and most use things you already have, like an old flannel shirt or a thrifted sweater. Each one shows what it looks like, how to make it, and one tip to help it turn out right the first time.
Gather a Few Basic Supplies First
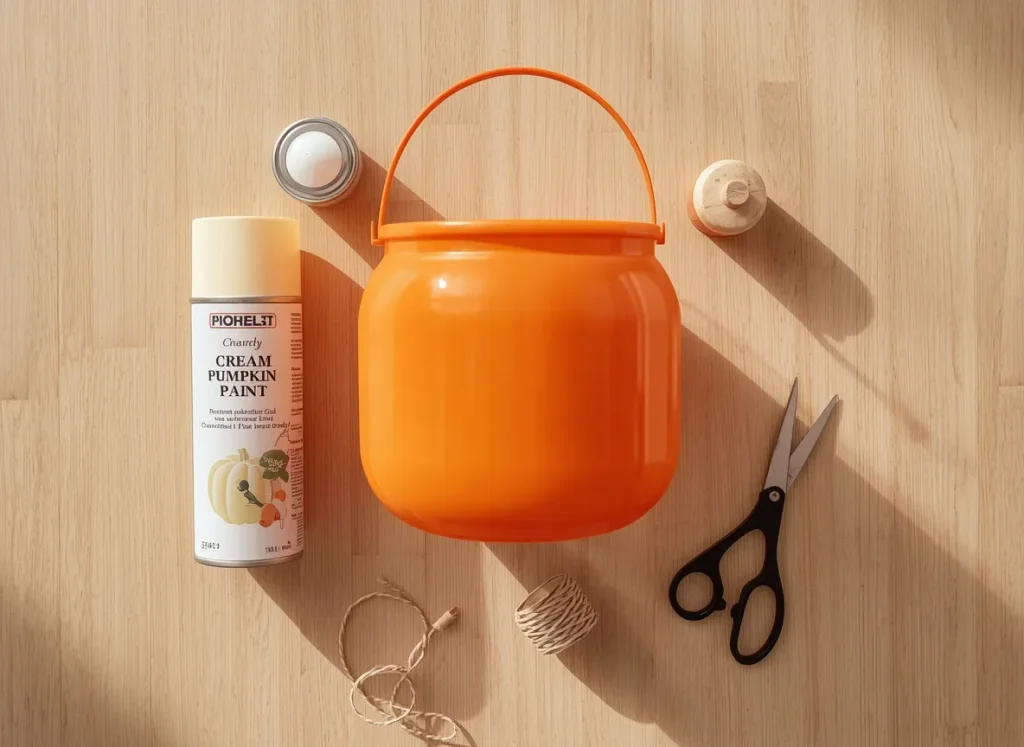
A bright orange plastic bucket sits in a patch of warm afternoon sun, surrounded by everything it needs for its big makeover: a can of cream spray paint, a small lid, a wooden cabinet knob that will soon become a stem, a loose tangle of twine, and a pair of black scissors.
Most of the ideas below start right here. Before any paint goes on, give the bucket a wash in warm soapy water and let it dry completely. Then rub the surface gently with fine sandpaper. It feels like an extra step, but smooth plastic is slippery, and that light scuff is what helps paint grip instead of peeling off the first time someone bumps it. If you want a closed pumpkin instead of an open bucket, stretch a few strips of duct tape across the top.
Good to know: Look for a spray paint labeled for plastic, and spray outside on a calm day. Thin coats always look smoother than one heavy one.
1. Turn a Bucket Into a Chalkboard Cider Cooler
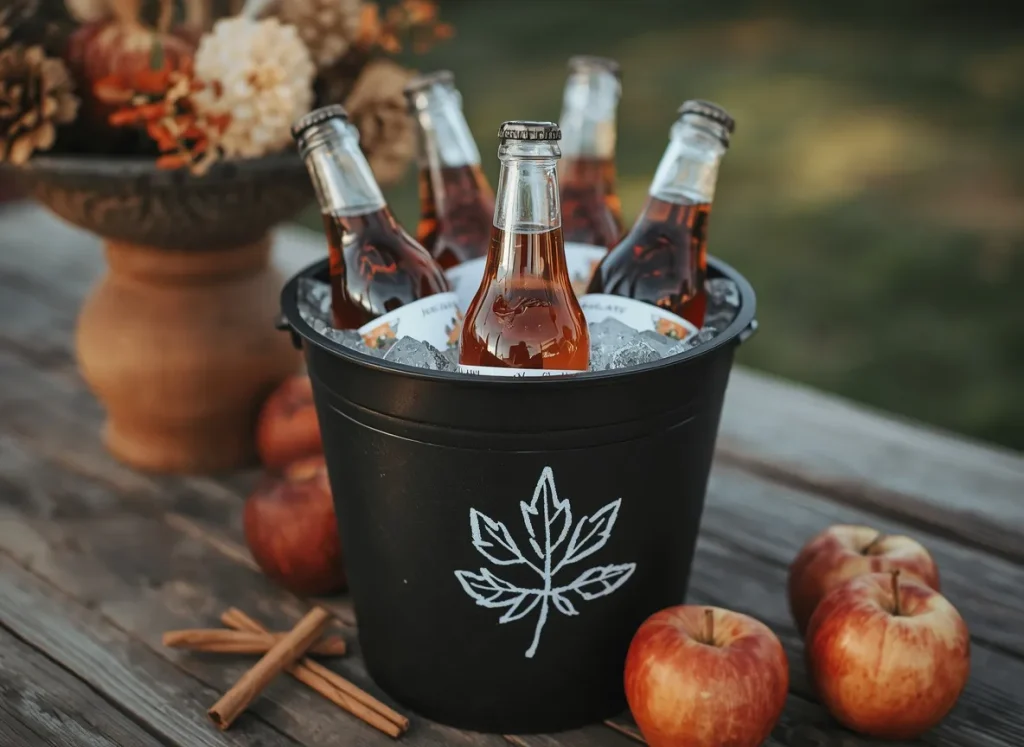
Ice clinks around glass bottles of amber apple cider in this matte black chalkboard bucket, set on a weathered wooden table outside. A simple white maple leaf is sketched on the front, and red apples and a few cinnamon sticks are scattered around it like the party is about to start.
This one is made for fall get-togethers. Spray the bucket inside and out with two thin coats of chalkboard paint, then give it a full day to cure before it meets any ice. Draw a leaf, a little pumpkin, or even the name of the drink with a chalk marker, which gives crisp white lines that wipe away later. Next weekend, it can hold popcorn bags for movie night instead.
Quick tip: Set the bucket on a folded towel or a tray, because the outside will sweat as the ice melts.
2. Fake a Speckled Stone Finish for the Garden
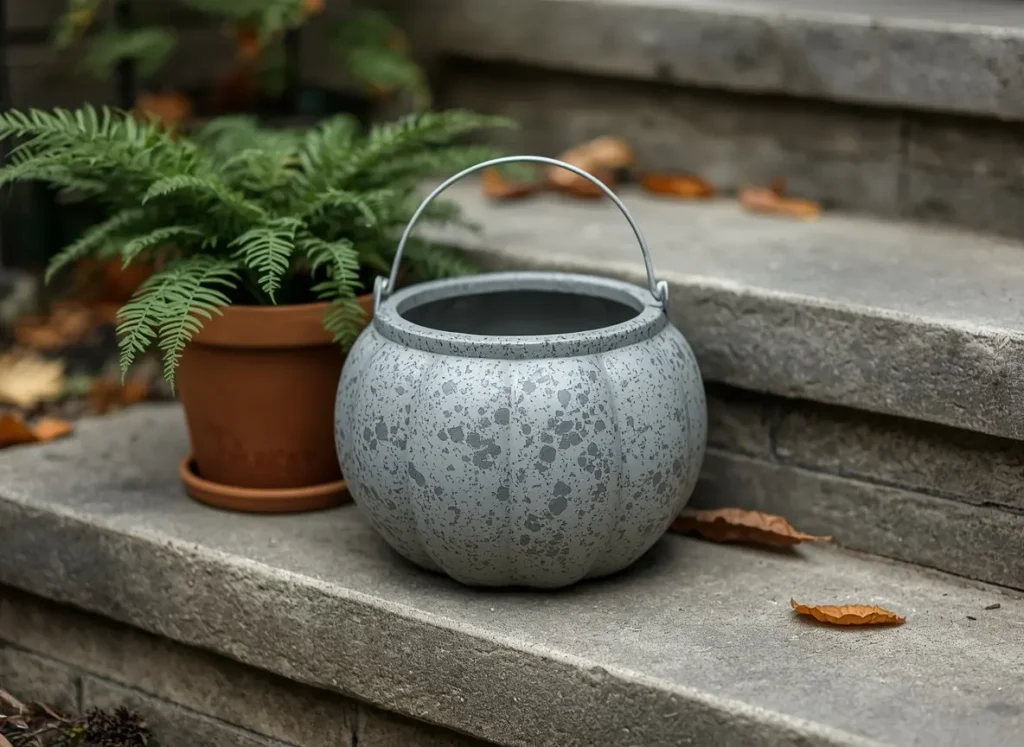
Soft grey paint with darker stone speckles gives this humble bucket the look of an old carved planter. It rests on worn concrete steps beside a leafy fern in a terracotta pot, with a few dry leaves blown up against it and its silver handle still in place, like a garden pail that has been there for years.
Start with a grey base coat and let it dry. Then pick up a can of stone effect spray paint and hold it a little farther away than you normally would, so the flecks land unevenly, the way they do on real granite. Outside, where shiny orange plastic tends to stand out for all the wrong reasons, this finish blends right in.
Make it useful: Slip a small potted mum or ivy inside and leave it in its nursery pot so the water can drain.
3. Plant Mums in a Copper Pumpkin by the Door
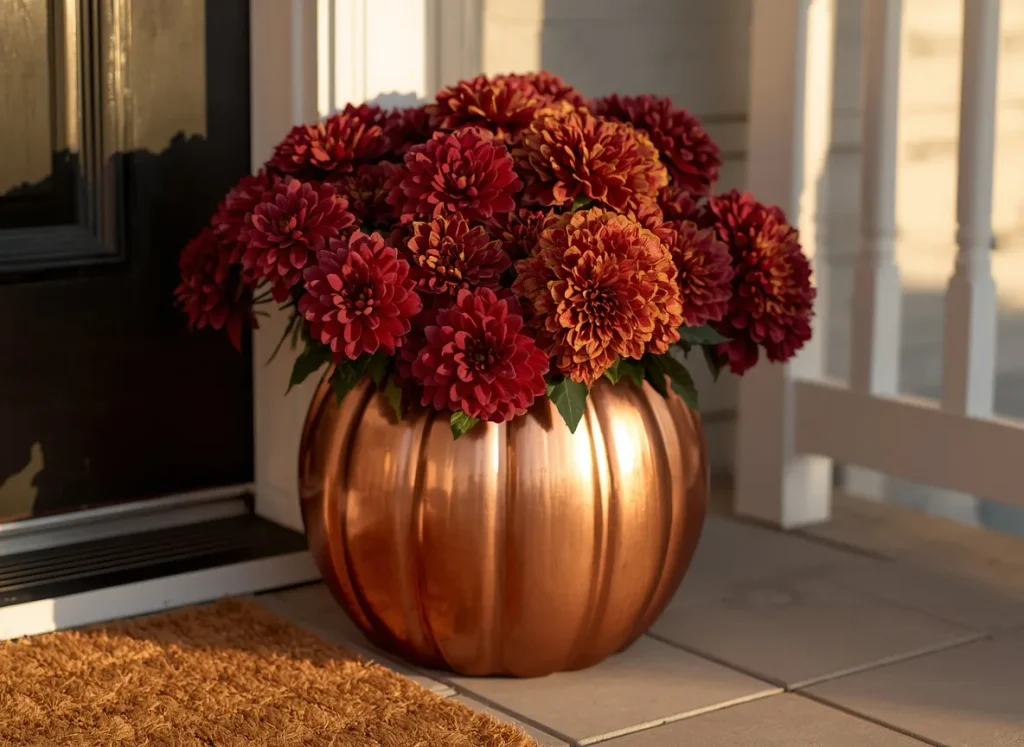
Deep burgundy and rust mums spill over the top of a shiny copper pumpkin that sits beside a front door. The low evening sun catches every curve of the ribs, and a coir doormat and white porch railing make the whole entrance feel warm and welcoming.
Snip off the handle first, then spray two or three light coats of metallic copper until not a speck of orange shows through. Once it is dry, simply lower a potted mum inside. Copper has a way of warming up any door, whether it is navy, black, or plain white, and it looks far more expensive than it is.
Planting tip: If you would rather plant straight into the pumpkin, drill a few small holes in the bottom first so rain can drain away instead of drowning the roots.
4. Paint Polka Dots on a Kids’ Candy Bucket
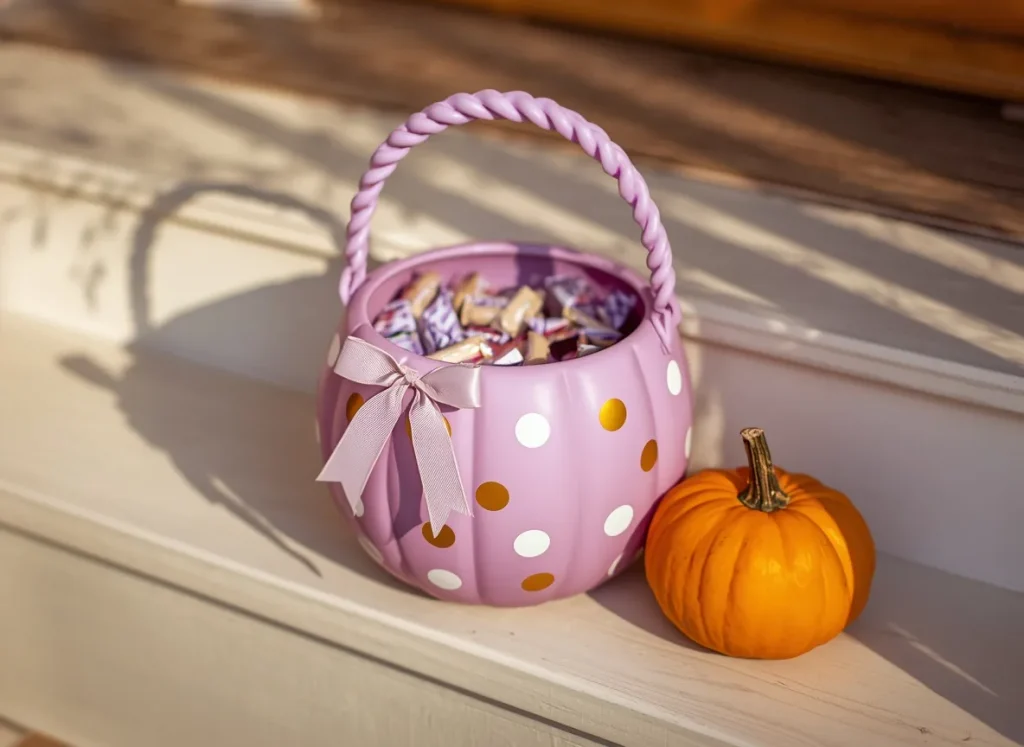
Sweet white and gold polka dots dance across this soft lilac candy bucket, sitting on a sunny porch step next to a tiny real pumpkin. A twisted lilac handle arches over the top, a pink ribbon bow is tied at the side, and it is filled to the brim with wrapped treats.
Kids tend to grab the same old orange bucket every year, so this is a fun way to make it feel brand new. Paint the whole thing, handle and all, in a soft pastel. When it is dry, dip a round foam dauber or the eraser end of a pencil into white and gold paint and press on the dots. Tie the bow on last.
Keep it pretty: A quick spray of clear sealer stops the dots from chipping when little hands dig in for candy.
5. Build a Rope Cage Over a Clear Pumpkin
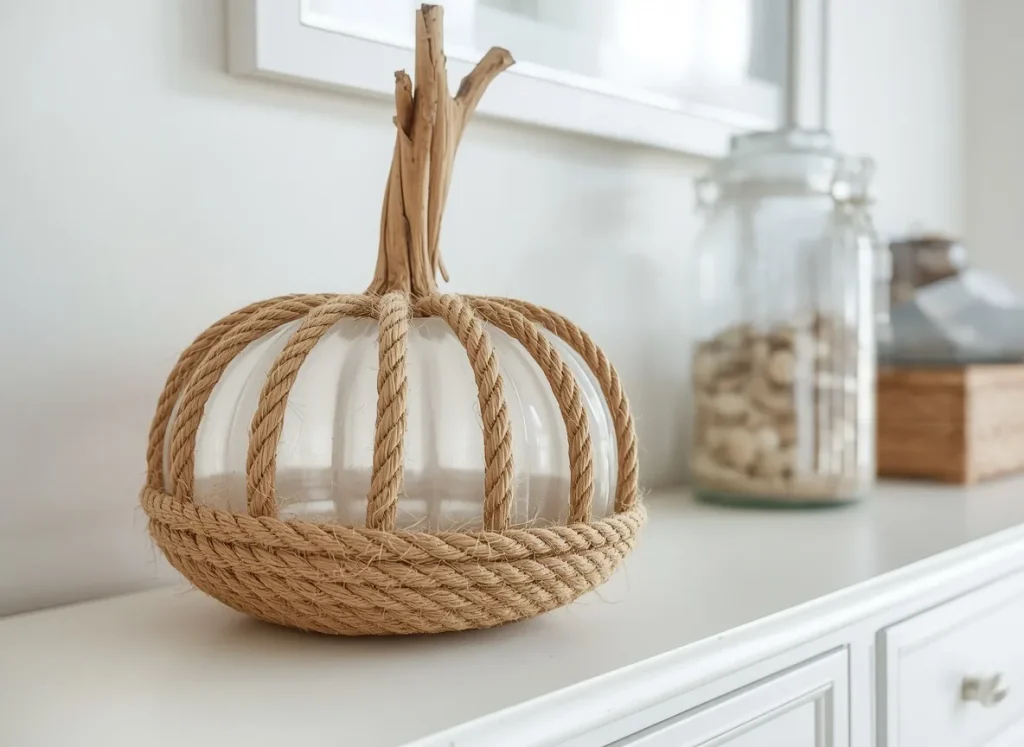
Light glows softly through a clear pumpkin wrapped in a cage of thick jute rope. The rope runs down every rib and coils neatly around the base, a weathered piece of driftwood stands in as the stem, and a glass jar of seashells sits on the white dresser behind it.
To make one, glue a long piece of rope down each groove of the pumpkin, working from the stem to the base. Then wind more rope around the bottom to hide all the ends. Push a short piece of driftwood into the top and you are done. Because the rope is open, the glassy plastic still peeks through, which gives it a light, beachy feel that looks lovely in a bathroom or on an entry table.
Watch out: Use a low temperature glue gun, since very hot glue can warp thin plastic.
6. Coil Jute Rope for a Woven Look
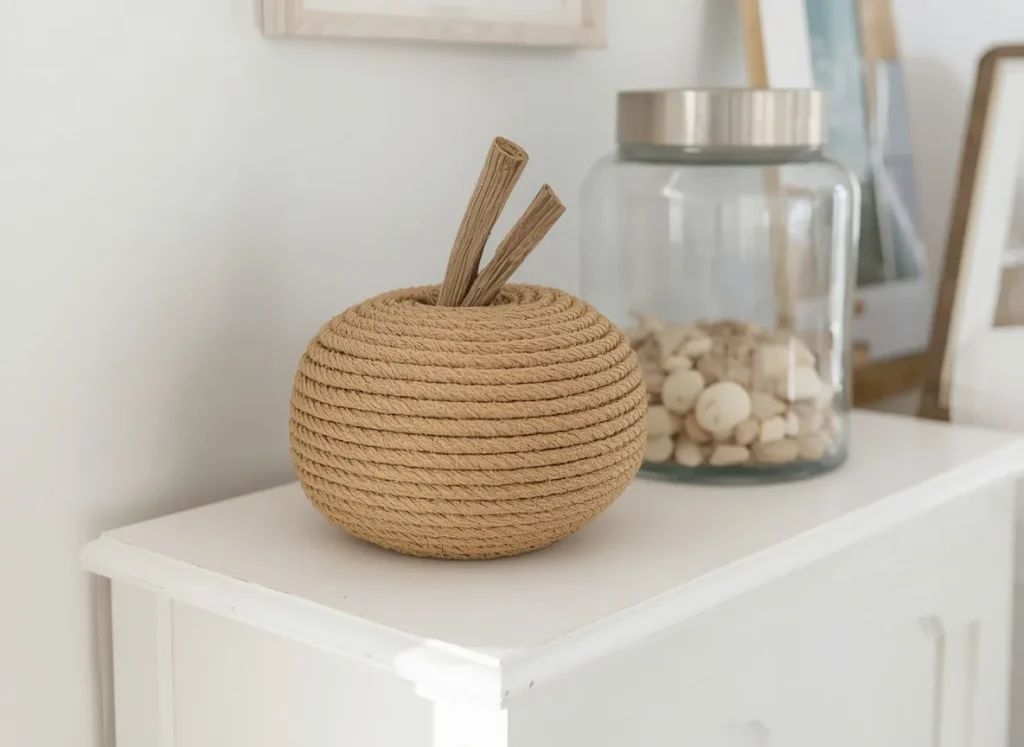
Wrapped from top to bottom in coiled jute rope, this round pumpkin looks like a woven piece from a fancy home store. Two twisted pieces of wood make the stem, and it sits on a white cabinet beside a big glass jar of shells, with soft framed art leaning in the background.
Begin right at the top, around the stem hole, and glue the rope in a tight spiral, working your way down a few inches at a time. Press each row snugly against the last so no plastic can sneak through. It takes a little patience, about one movie’s worth, but this is the makeover where nobody will ever guess what is underneath.
Finishing touch: Tuck the final end of rope under the bottom and glue it there, so the pumpkin looks clean from every side.
7. Wrap a Pumpkin in Burlap for the Kitchen
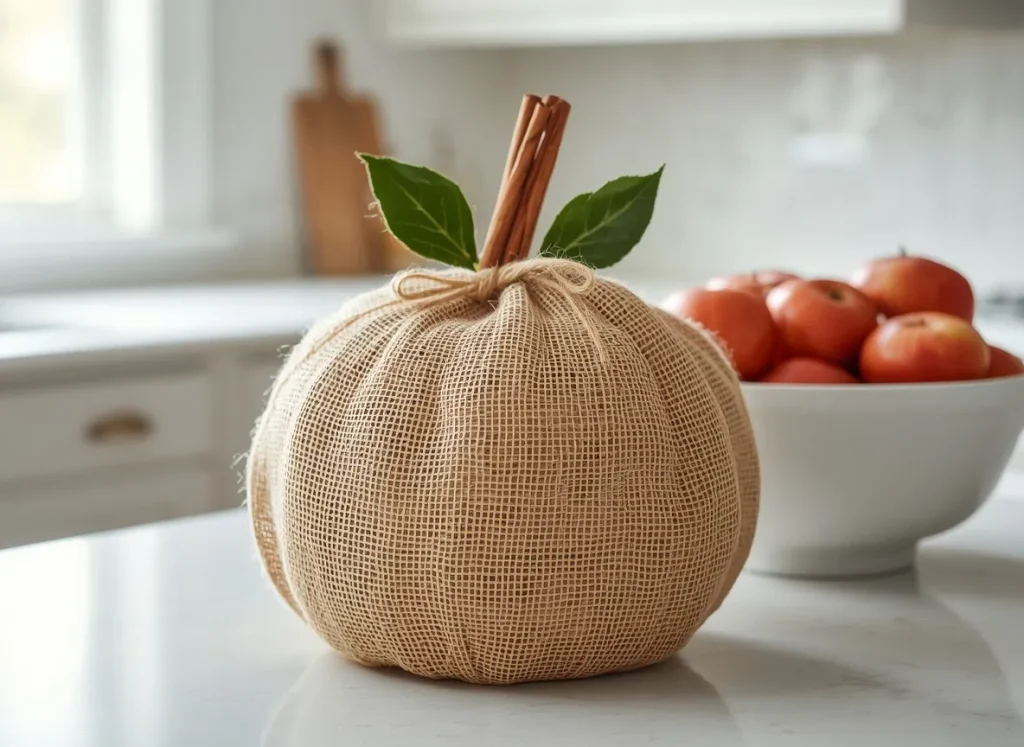
Loose weave burlap gathered with twine turns a plain plastic pumpkin into a rustic piece that looks right at home on a kitchen counter. A bundle of cinnamon sticks pokes up as the stem, two glossy green leaves frame it, and a bowl of red apples sits close by in the soft morning light.
This might be the quickest idea on the list. Set the pumpkin in the middle of a square of burlap, pull all the corners up to the top, and hold them in place with a rubber band. Wrap twine over the band, trim away the extra fabric, and push in a few cinnamon sticks. For a real pumpkin shape, press the burlap into the grooves with rubber bands around each section.
Bonus: The cinnamon sticks give off a soft, spicy scent, and you can swap in fresh ones whenever it fades.
Also read: 15 Behind the Door Storage Ideas That Make a Small Home Feel Bigger
8. Cover It in Red Flannel Plaid
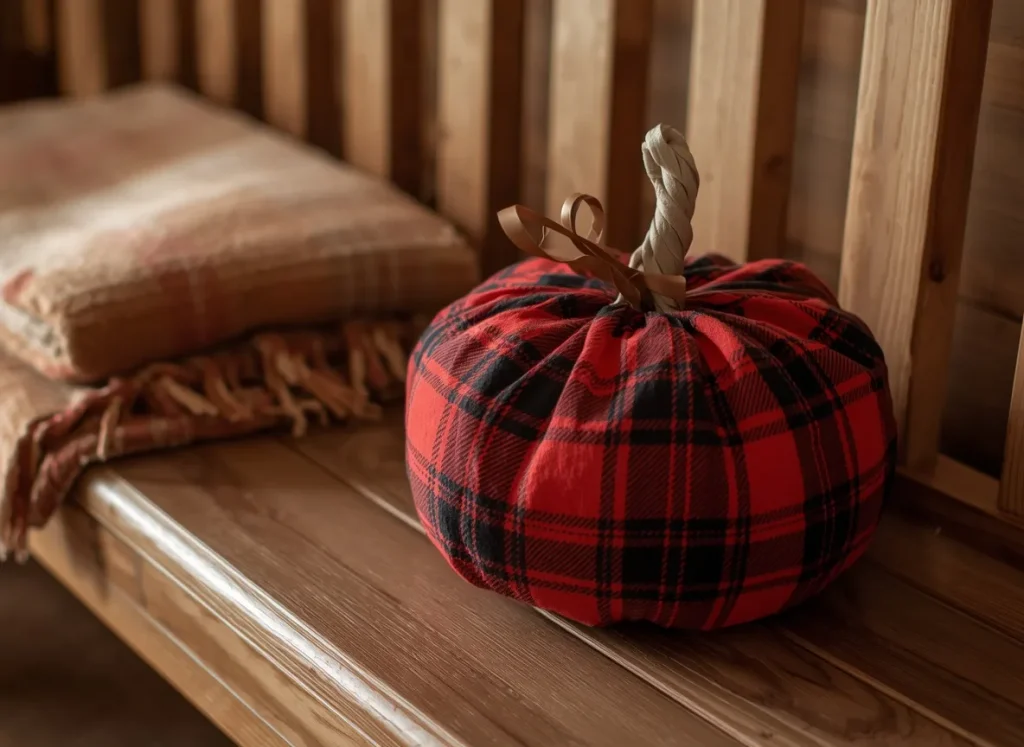
An old flannel shirt gets a cozy second life here. Red and black flannel plaid wraps snugly around the pumpkin, a twisted cream fabric stem pokes out the top, and a brown ribbon curls around it like a little vine. It rests on a wooden bench beside a fringed wool blanket, looking like it belongs in a mountain cabin.
Wrap it the same way you would the burlap version, gathering the fabric at the top and securing it with a rubber band. For the stem, twist a strip of leftover fabric tightly and glue it in the center, then curl a ribbon around it. One shirt is usually enough for a medium bucket.
Make it hold: Mist the fabric lightly with spray starch before you wrap it, so it keeps its round pumpkin shape instead of sagging.
9. Decoupage Cream Tissue Paper for an Heirloom Look
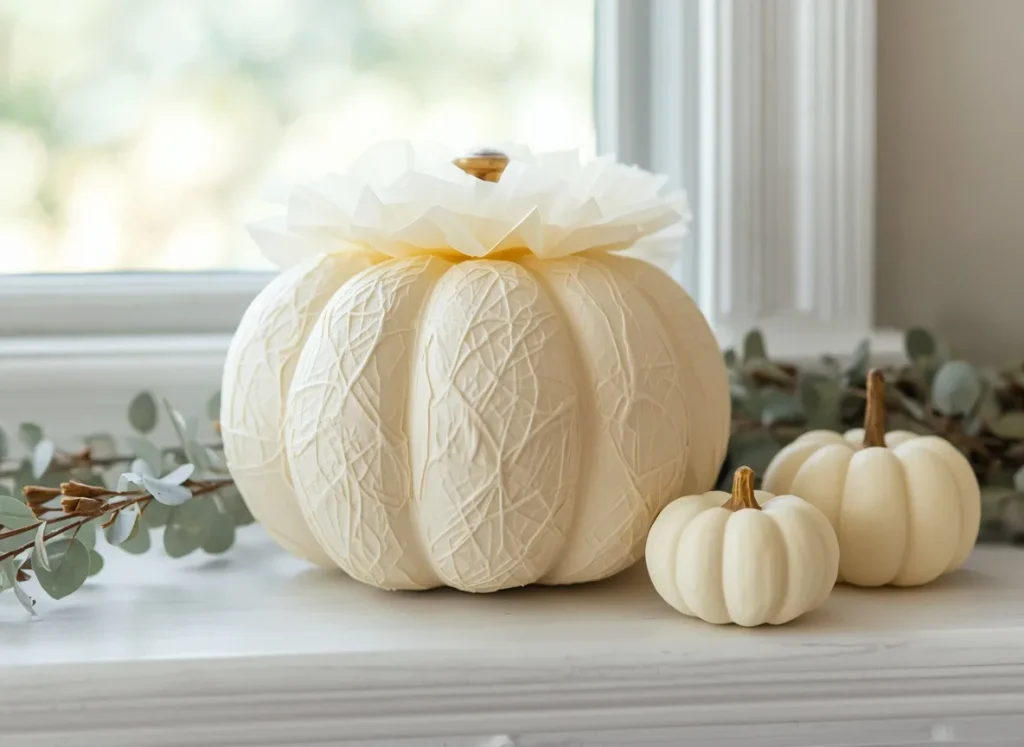
Soft, wrinkled cream tissue paper covers this large pumpkin as it sits on a white window ledge in gentle daylight. Fine lines run across every rib like the skin of an old heirloom pumpkin, a ruffle of tissue circles the top, and a little brass knob makes the stem. Two tiny cream pumpkins and a sprig of eucalyptus keep it company.
Tape over the opening, spray the pumpkin cream, and let it dry. Then brush decoupage glue over one small section at a time and press on pieces of crumpled tissue, letting the wrinkles stay. Finish with one more thin coat of glue over everything and screw or glue the knob in the center.
Secret trick: Crumple each sheet into a ball and smooth it back out before using it. Those tiny creases are exactly what make it look like real pumpkin skin.
10. Cut Out Stars for a Glowing Lantern
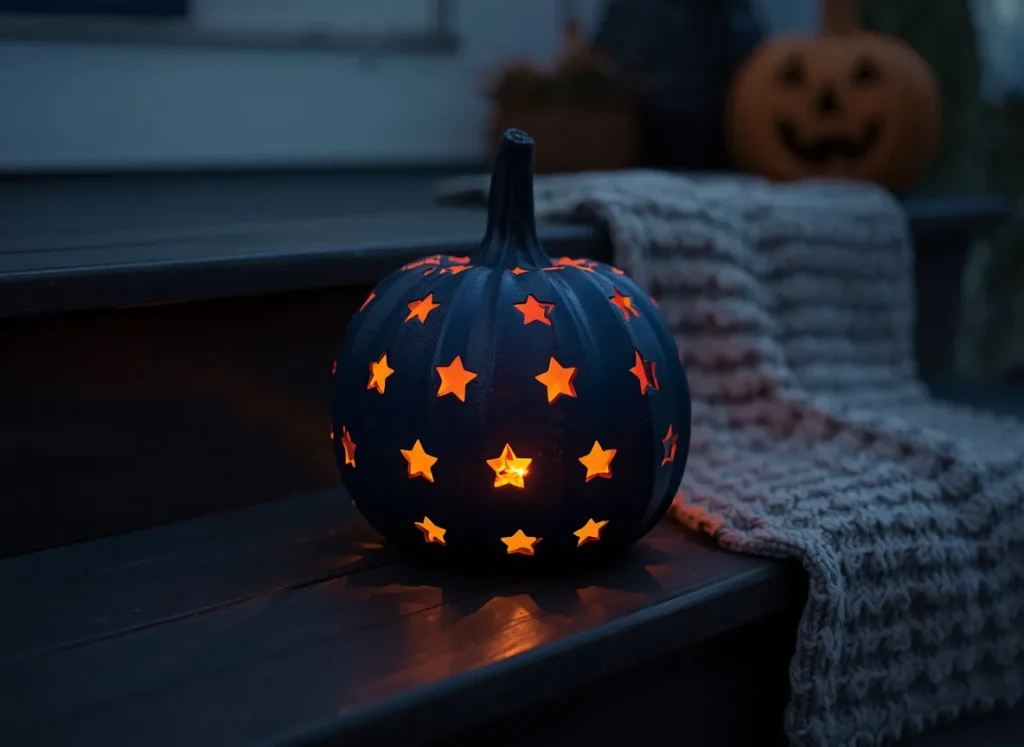
Warm orange light spills out of dozens of star shaped cut outs in this deep navy pumpkin, sitting on dark porch steps as the evening settles in. A chunky grey knit blanket drapes beside it, and a classic jack-o’-lantern glows softly in the background.
Paint the pumpkin first and let it dry. Then lightly sketch little stars all over it in pencil and carefully cut them out with a sharp craft knife. If stars feel fiddly, a drill with a small bit makes easy round dots that glow just as nicely. Slip a battery light inside, and you have a lantern you can bring out year after year, unlike a carved pumpkin that is gone in a week.
Safety first: Only use battery tea lights or LED puck lights inside plastic. A real flame can melt it.
11. Add Gold Leaf to a Matte Black Pumpkin
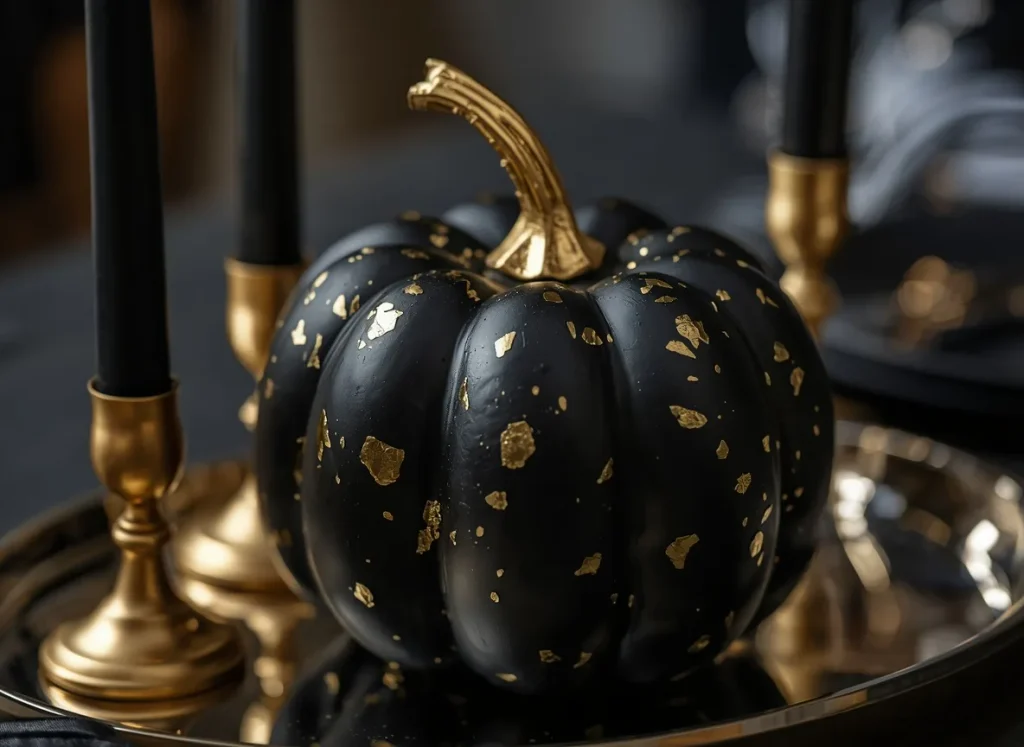
Flakes of shiny gold leaf scatter across this matte black pumpkin, and its curling stem gleams bright gold. It sits on a mirrored tray between black taper candles in brass holders, catching the low evening light like something from a moody dinner party.
Paint the pumpkin matte black and let it dry completely. Dab gold leaf adhesive in small, random spots and wait until it feels tacky. Then press on torn pieces of gold leaf and gently brush away the extra with a soft dry brush. A little gold paint on the stem ties the whole look together.
Less is more: Keep the gold spots small and uneven. A few scattered flakes always look more expensive than a fully gilded pumpkin.
12. Use a White Pumpkin as a Thanksgiving Vase
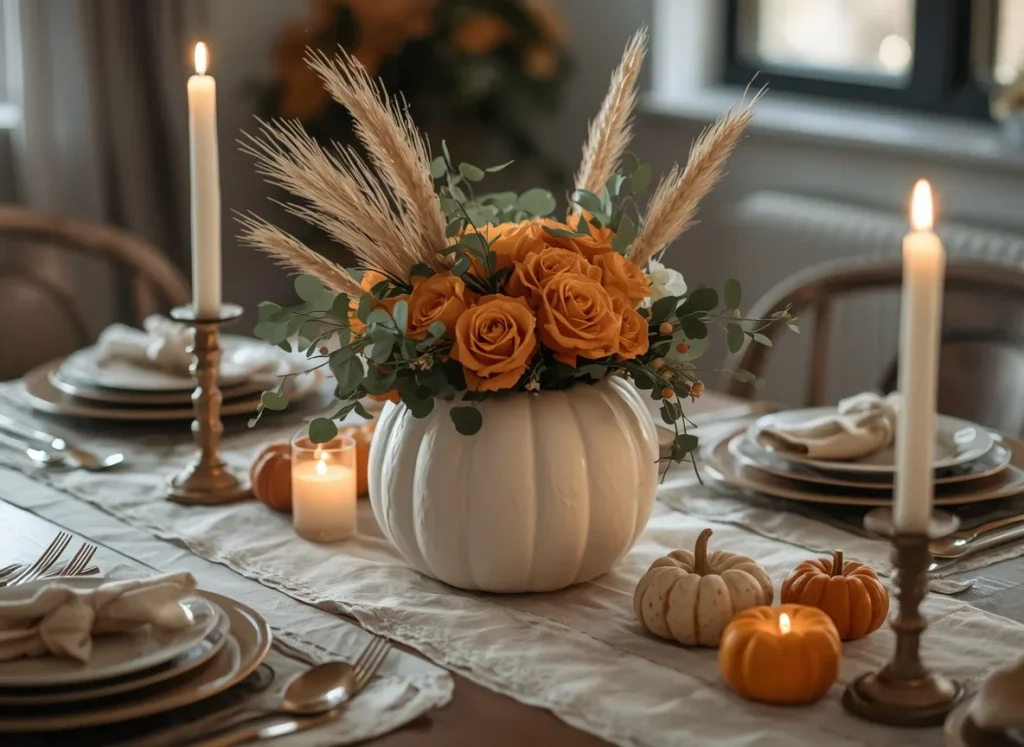
Orange roses, soft eucalyptus, little berries, and tall feathery pampas burst out of a matte white pumpkin vase in the center of a Thanksgiving table. Brass candlesticks with white tapers, linen napkins on stacked plates, a glowing votive, and a handful of mini pumpkins finish the warm, welcoming setting.
Spray the pumpkin white and let it dry, then set a jar of water or a block of wet floral foam inside. Start with the roses, tuck eucalyptus in around them, and add the tall dried stems last for height and movement. It looks like a florist made it, but it costs a fraction of the price.
Table tip: Keep the arrangement low enough that guests can still see each other across the table, and always use a jar inside so nothing leaks onto the tablecloth.
13. Paint a Faux Wood Grain Finish

Warm streaks of faux wood grain make this pumpkin look like it was carved by hand from a block of polished wood. It sits on a rustic shelf beside a stack of old red and green books and a little brass cup, with a dark curved stem rising from the top.
Paint a warm tan base coat and let it dry. Brush a thin layer of brown glaze over the top, then slowly drag a wood graining tool or a dry, stiff brush through it from the stem down to the base along each rib. The grain naturally follows the pumpkin’s curves, which is what makes it look so real. Seal it with a clear gloss coat for that polished finish.
Practice first: Try a few grain lines on a piece of cardboard before you start, so the pattern looks natural on the pumpkin.
14. Slip on a Chunky Knit Sweater Sleeve
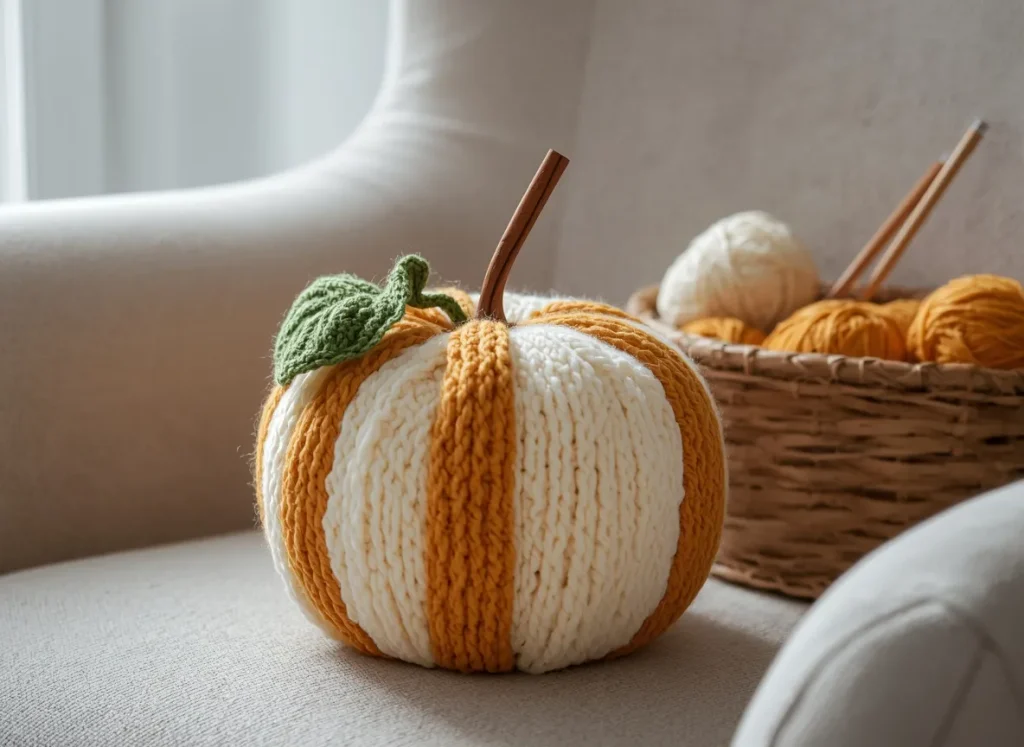
Thick cream chunky knit with mustard stripes along each rib makes this pumpkin look soft enough to hug. A crocheted green leaf and a thin wooden stem sit on top, and a woven basket full of yarn and knitting needles waits beside it on a cozy beige armchair.
You do not need to knit a single stitch for this one. Slide an old chunky sweater sleeve over the pumpkin, gather the ends at the top and bottom, and glue them in place. For stripes like these, glue lengths of contrasting yarn down each groove. Add a twig for the stem and a small felt or crocheted leaf.
Thrift it: Secondhand shops are full of chunky sweaters, and one sweater can cover two or three pumpkins for the sofa and reading nook.
Also read: 15 Dry Erase Calendar Ideas to Keep Your Home Organized Every Month
15. Wrap It in Blush Velvet With a Gold Stem
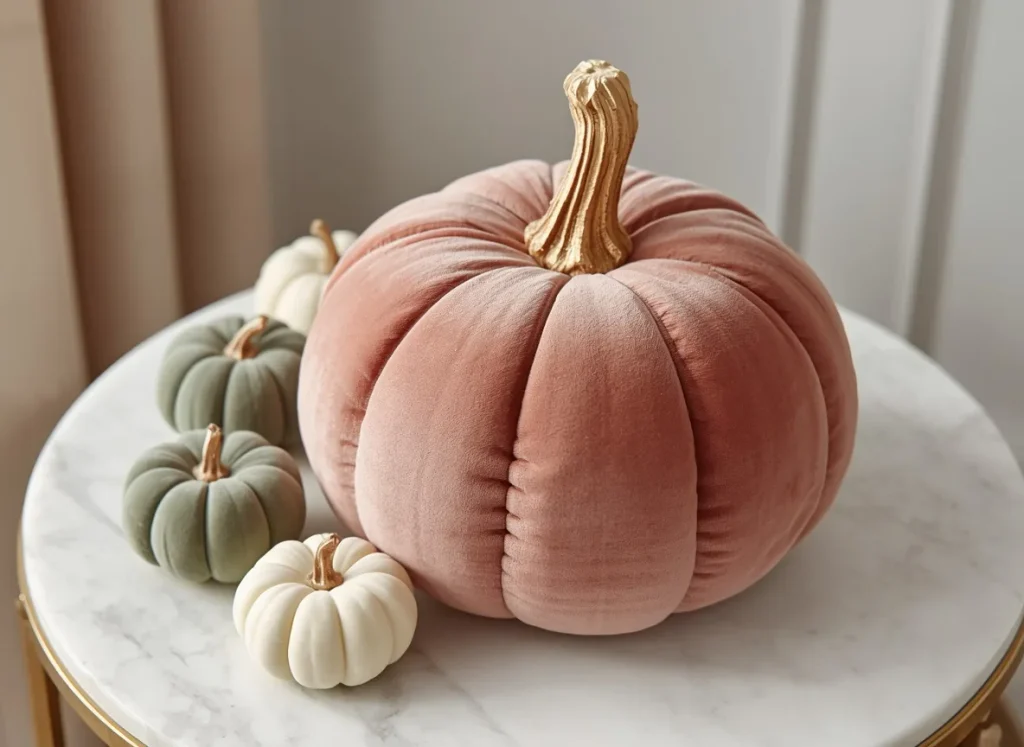
Plump ribs of blush pink velvet give this large pumpkin a soft, luxe look on a round marble side table with a gold edge. Its stem is painted shiny gold, and three little pumpkins in sage green velvet and creamy white sit beside it like a tiny family.
Wrap the pumpkin in a thin layer of polyester stuffing first, then cover it with velvet and gather the fabric at the top. Pull strong twine or thread tightly down each section to create those puffy ribs, then glue a real or faux stem in the center and paint it gold. Want to make the little ones too? This step by step velvet pumpkin tutorial from HGTV shows how to shape small pumpkins from fabric alone, no bucket needed.
Color tip: Muted shades like blush, sage, and cream look high end and carry your decor from early fall right through the holidays.
Plastic Pumpkin Bucket DIY FAQs
What paint sticks best to plastic pumpkins?
Use spray paint made for plastic, or spray a plastic primer first. Scuff the surface lightly with fine sandpaper and build up thin coats instead of one thick one.
How do I close the top of a plastic pumpkin bucket?
Remove the handle and stretch duct tape or a circle of cardboard across the opening. Paint or fabric goes right over it, and a stem in the center hides the middle.
Can I leave painted plastic pumpkins outside?
Yes, painted ones handle porch weather well, especially with a clear outdoor sealer. Keep fabric, tissue, and yarn versions indoors or under a covered porch.
Is it safe to put a candle inside a plastic pumpkin?
No. A real flame can melt the plastic. Use a battery tea light, an LED puck light, or a string of fairy lights instead.
Final Thoughts on Plastic Pumpkin DIY
A cheap candy bucket is one of the easiest things to turn into decor that looks far more expensive than it is. A coat of copper, a wrap of burlap, or a bit of velvet can carry it from Halloween right through Thanksgiving, and it keeps another piece of plastic out of the trash. These plastic pumpkin bucket DIY ideas work for beginners, families, and anyone who likes a weekend project.
Pick one makeover this weekend and see how far one little bucket can go.
Save this pin so you have these ideas ready the next time you spot a plastic pumpkin on the shelf.

1 thought on “15 Plastic Pumpkin Bucket DIY Ideas That Turn Cheap Candy Buckets Into Fall Decor”