

The dentist appointment you forgot. The bake sale nobody mentioned until the night before. The bill that slipped past its due date because it lived in someone’s phone and nowhere else. Busy homes rarely fall apart because people do not care. They fall apart because nobody can see the plan.
A dry erase calendar puts the whole month in one place the entire family walks past every day. It costs little, changes in seconds when plans shift, and unlike a phone app, nobody has to remember to open it. The real trick is picking the right style for the right spot, because a calendar hidden in a corner gets ignored by the second week.
Below are 15 ideas for every part of the home, including the entryway, kitchen, pantry, kids’ rooms, laundry room and home office. Each one shows why it works and how to set it up, and you will also find the two things most guides forget plus quick answers to common questions. Pick the one that fixes your biggest headache and hang it this weekend.
1. Hang a Clear Acrylic Calendar in the Entryway

A clear acrylic dry erase calendar floats on a soft cream wall here, held by four round gold standoff screws, so the wall shows through and it reads more like decor than a to do list. Below it, a slim oak console holds a glass vase of greenery, a white bowl and a small lidded jar, with a woven basket and a white bin tucked underneath. Brass hooks beside it hold a gray scarf and a tan tote.
Why it works: The entryway is the last place everyone passes on the way out, so plans get seen at exactly the right moment, and clear acrylic suits any wall color.
Make it work: Hang it at eye level, about 57 to 60 inches from the floor to the center. Use a white or light colored marker on darker walls and a fine black one on pale walls so the writing stays easy to read.
2. Turn a Large Picture Frame Into a Glass Calendar
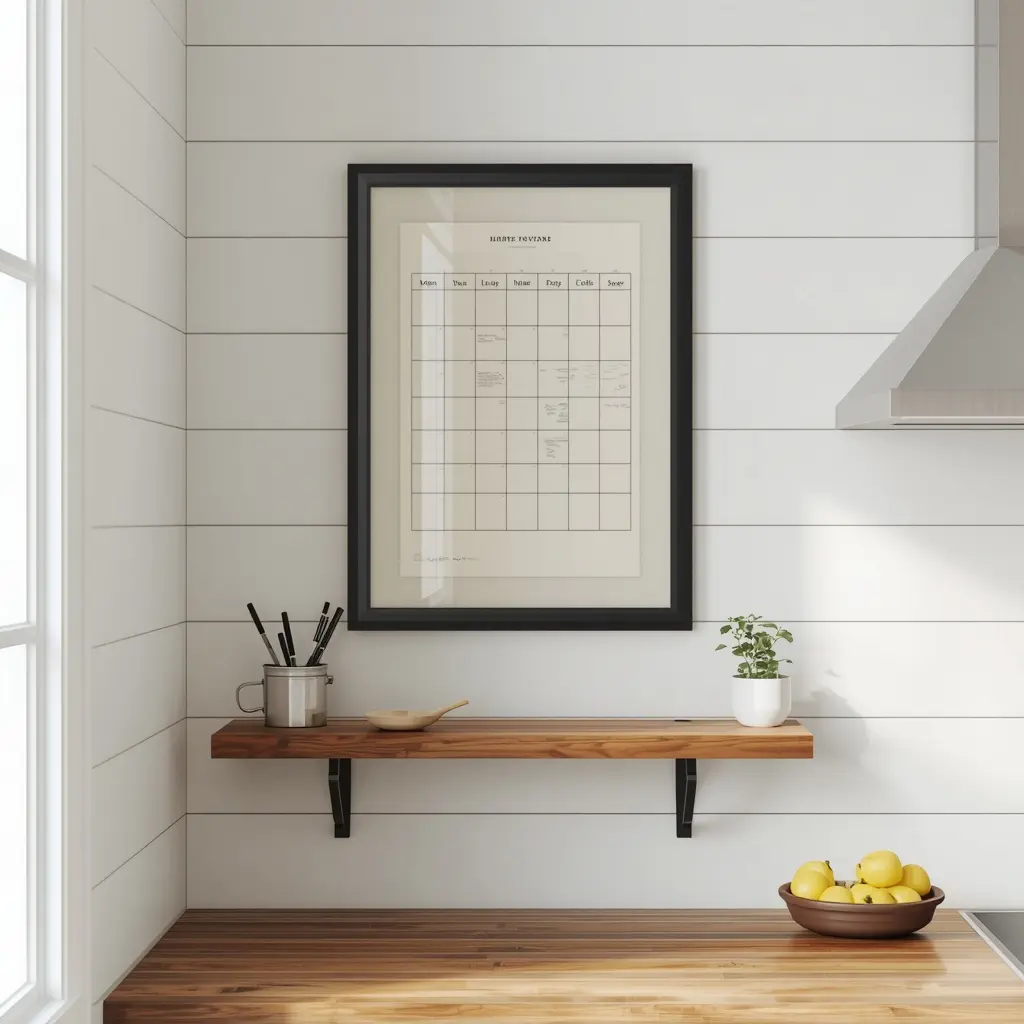
A simple black frame hangs on white shiplap in this kitchen corner, with a printed monthly grid on cream paper slipped behind the glass. A wooden floating shelf on black brackets sits below, holding a metal cup of black markers, a small wooden spoon and a potted herb. A butcher block counter with a bowl of lemons and a steel range hood complete the calm farmhouse look.
Why it works: You write straight onto the glass, so it wipes clean just like a store bought board, and you can swap the paper whenever you want a new color or layout.
Make it work: Print any free monthly grid at the size of your frame, slide it behind the glass and test a marker in one corner. Choose real glass rather than thin plastic, since glass wipes clean without staining or scratching.
3. Stick a Magnetic Calendar on the Fridge for Meal Plans
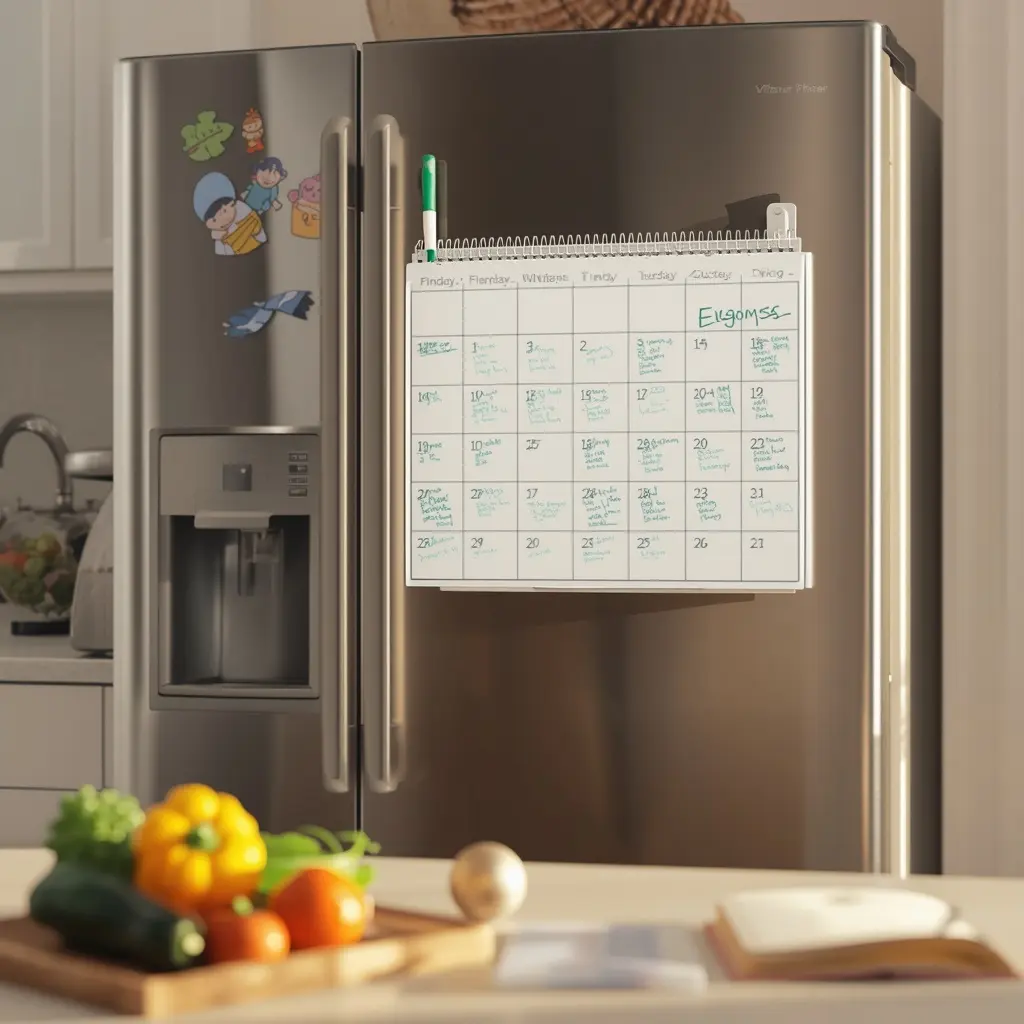
“What’s for dinner?” stops being a daily question when the answer lives on the fridge. A white magnetic dry erase calendar with a spiral top sits on this stainless steel side by side fridge, filled with plans in green marker and a matching marker clipped right beside it. Colorful kids’ magnets brighten the other door, while a cutting board of yellow pepper, tomatoes and zucchini waits on the counter in front.
Why it works: The fridge is opened dozens of times a day, so the meal plan is impossible to miss, and keeping the marker attached means nobody goes hunting for a pen.
Make it work: Plan the week’s dinners on Sunday, then write your grocery list from the board while you can see every night at once. Choose a calendar with a strong full magnetic back so it does not slide down the door.
4. Make the Mudroom Your Family Command Center
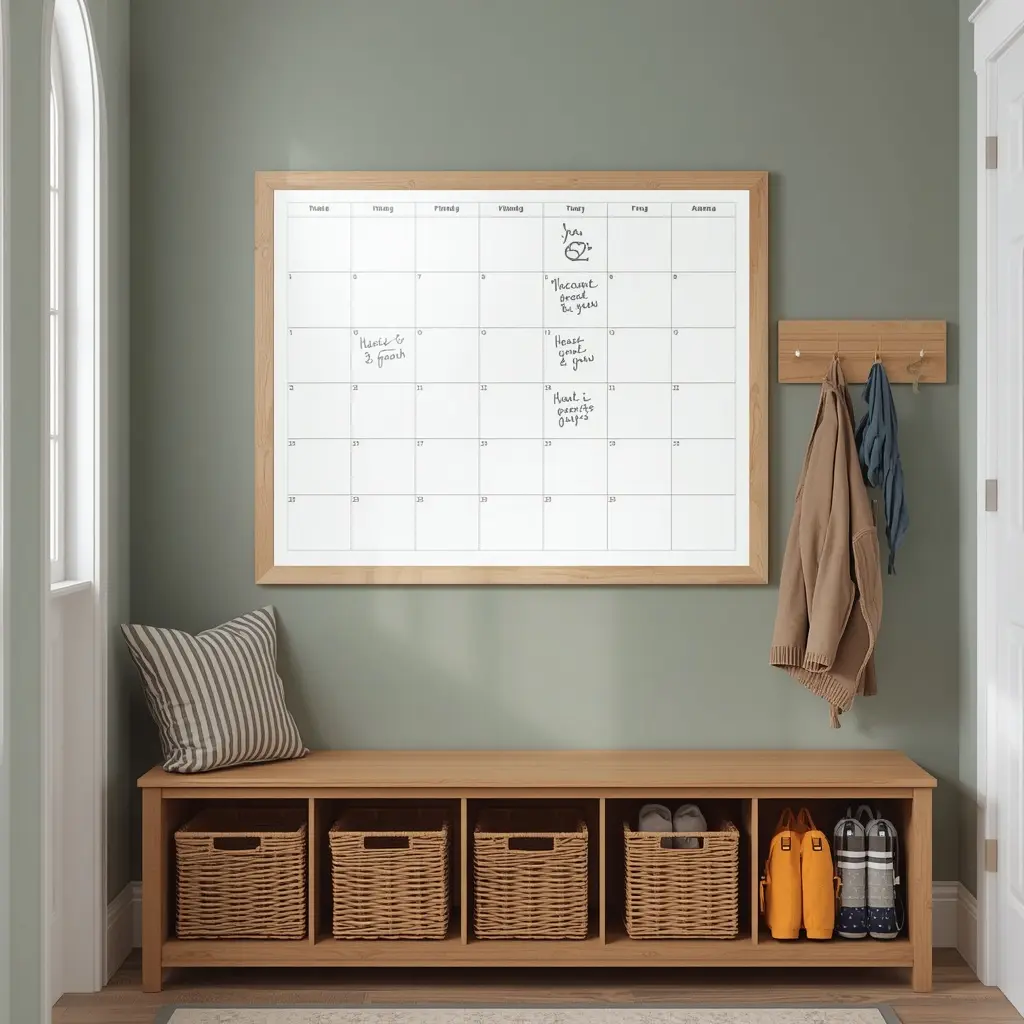
A large monthly board in a light wood frame hangs on a sage green wall above a wooden bench with open cubbies. Woven baskets, sneakers and a pair of rain boots fill the cubbies, a striped pillow softens the bench, and a wooden hook rail beside the board holds a tan sweater and a blue scarf. An arched window keeps the whole corner bright.
Why it works: Bags, shoes and coats already live here, so adding the calendar turns the mudroom into one stop for leaving the house ready.
Make it work: Give each person their own marker color and add a small color key in one corner, so anyone can see who has practice or a party at a glance. Use black for events that involve the whole family.
5. Pair a Monthly and a Weekly Board in the Home Office
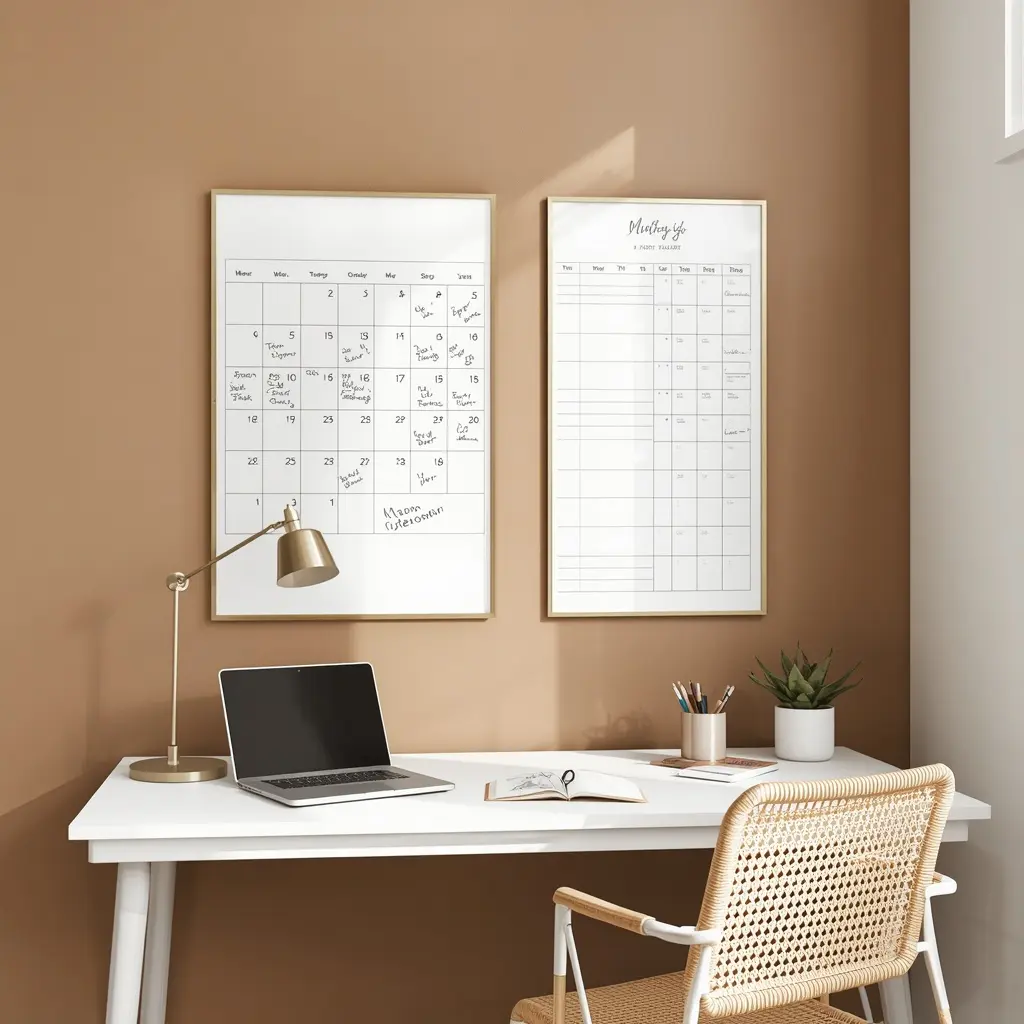
Two boards in thin gold frames hang side by side on a warm caramel wall, a monthly dry erase calendar on the left and a narrow weekly planner with time slots on the right. A white desk below holds a brass task lamp, a laptop, an open notebook, a cup of pencils and a small succulent, with a woven rattan chair tucked in front.
Why it works: One board shows deadlines and trips, the other holds calls, errands and focus time, so you never lose the big picture while planning each day.
Make it work: Every Monday morning, move the week’s tasks from the monthly board to the weekly one. Keep the two frames the same finish and hang them at the same height so the wall looks planned.
6. Go Black for a Chalkboard Look Without the Dust
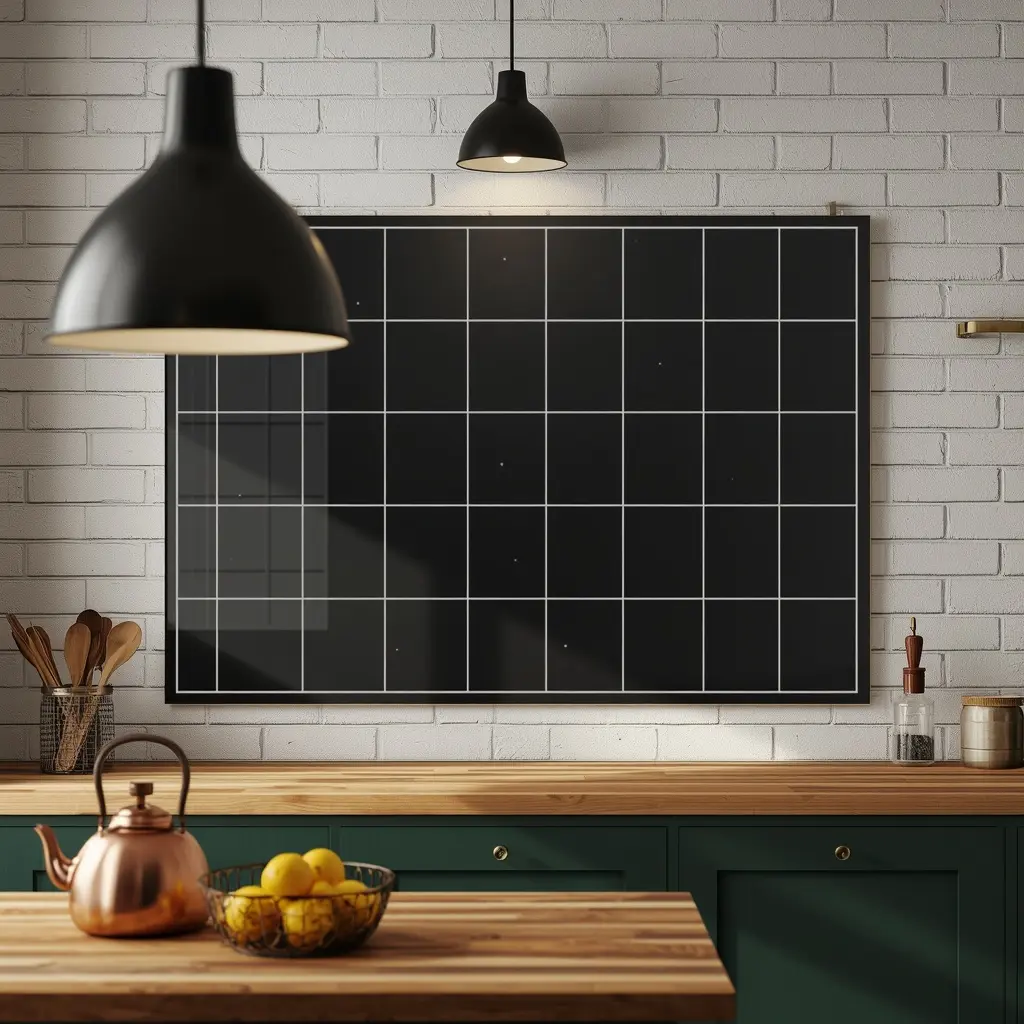
A large black glass board with a crisp white grid hangs on a white painted brick wall, its empty squares ready for the month ahead. Two black pendant lights glow in front of it, while a butcher block counter below holds a jar of wooden spoons and a glass pepper mill. On the island in front, a copper kettle and a wire basket of lemons sit above deep green cabinets with brass knobs.
Why it works: Black glass gives the cozy chalkboard look, yet wipes clean with a damp cloth, so there is no dust on the counters or food below.
Make it work: Use liquid chalk markers or white dry erase markers made for dark glass. Test them in one corner first, because liquid chalk can stain porous chalkboard paint even though it wipes cleanly off glass.
7. Put a Meal Planner and Grocery List Inside the Pantry Door
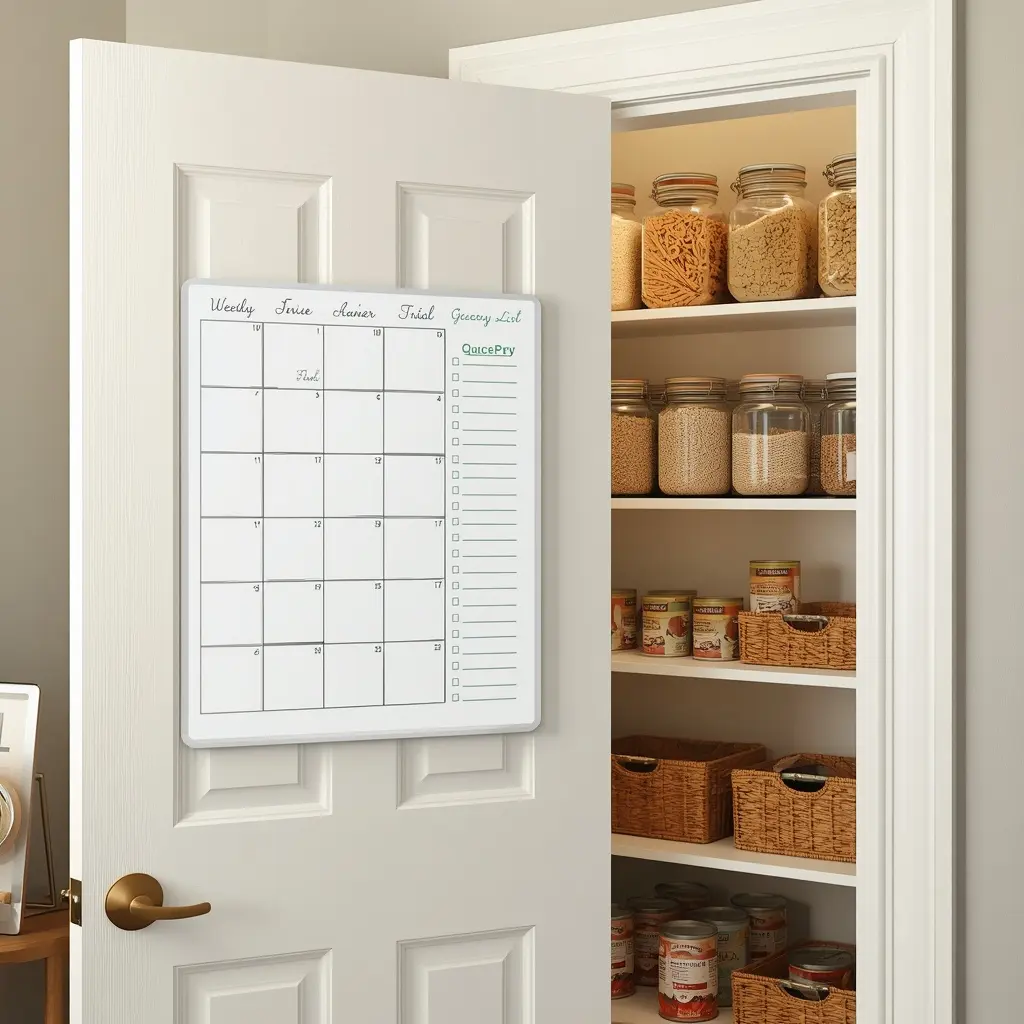
Not everyone wants plans on display. This white board is mounted on the inside of a paneled pantry door, with a weekly grid on one side and a green grocery checklist column on the other. Behind it, the open pantry shows tall glass jars of pasta and grains, rows of canned goods and woven baskets on white shelves.
Why it works: You check the meal plan right where you see what is running low, so the shopping list practically writes itself during the week.
Make it work: Use adhesive strips rated for the board’s weight so the door needs no drilling. Add an item to the grocery column the moment a jar runs low, and snap a photo of the list before you head to the store.
8. Build a Picture Chore Chart for Kids

Kids follow routines much better when they can see them. This wide pastel chart hangs on a white wall with soft colored tabs across the top, little picture icons for each job and a column of colorful stars on the side for finished tasks. A low white cube shelf below holds white woven baskets, crayon cups, picture books and small toys, all at kid height.
Why it works: Picture icons work even for children who cannot read yet, and the star column turns everyday jobs into a small, fun game.
Make it work: Hang the chart at your child’s eye level, not yours, so they can mark their own progress. Keep it to two or three jobs a day for young kids so the chart feels doable rather than stressful.
9. Map Out Cleaning Days in the Laundry Room
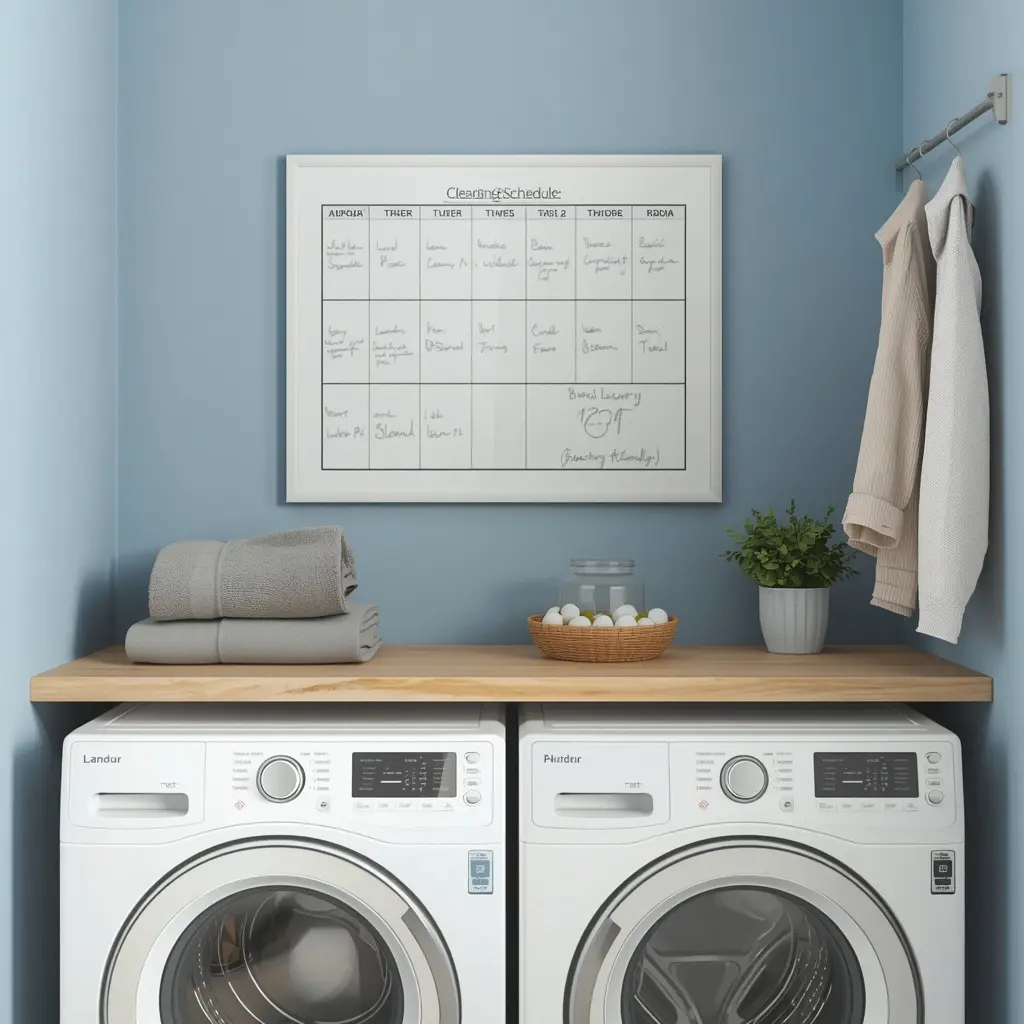
A white framed weekly cleaning schedule hangs on a soft blue wall above a front loading washer and dryer. A light wood countertop over the machines holds folded gray towels, a wicker basket of wool dryer balls and a small potted plant, while a wall rod on the right holds a knit cardigan and a white shirt.
Why it works: Splitting the housework into one short task a day keeps the whole home under control without losing your entire weekend to cleaning.
Make it work: Keep each daily job small enough to finish in about 15 minutes, like bathrooms on Monday and floors on Thursday. Short tasks are much easier to stick with than long ones.
10. Frame a Farmhouse Calendar in the Dining Nook
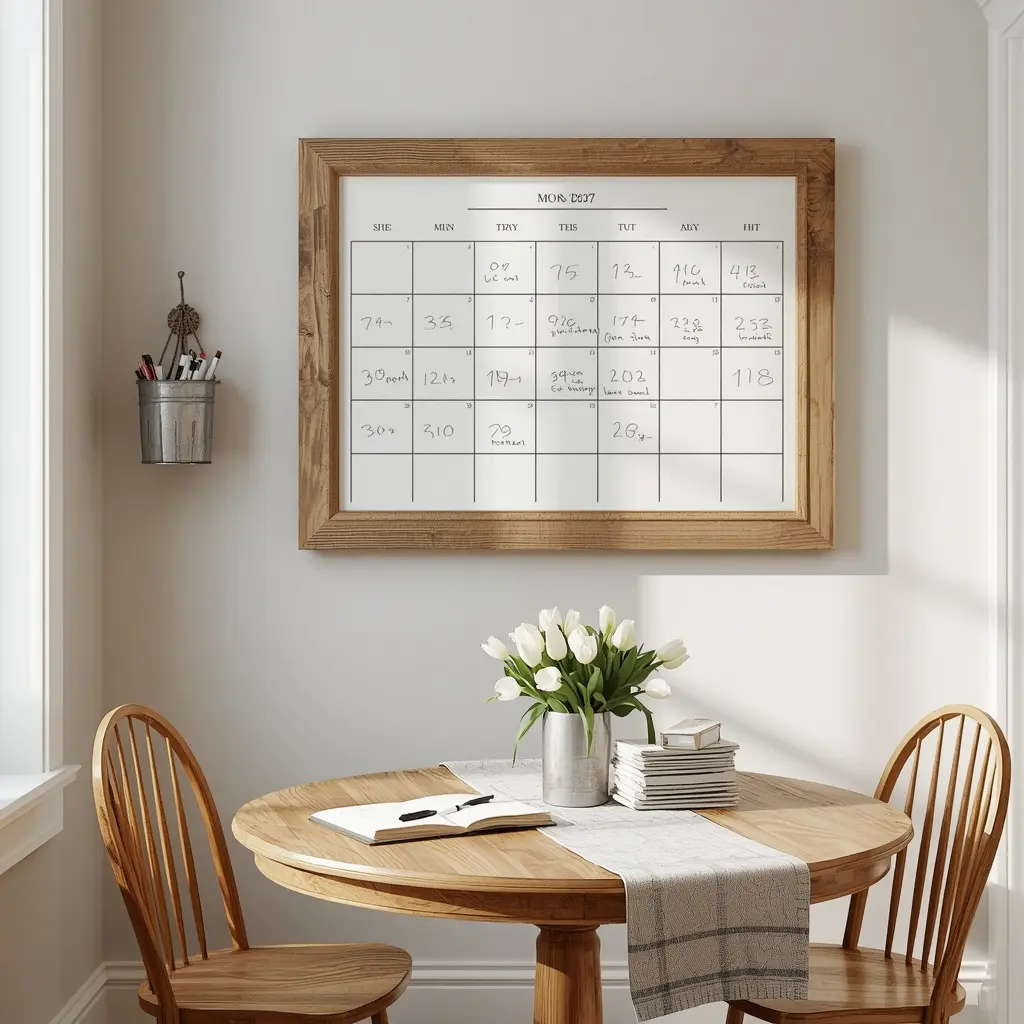
A large monthly dry erase calendar in a chunky reclaimed wood frame hangs on a warm white wall, with a small galvanized bucket of markers hanging on a hook beside it. Below, a round wooden table with two spindle back chairs holds a metal vase of white tulips, an open notebook with a pen, a stack of mail and a gray plaid runner, all glowing in afternoon sun.
Why it works: The table is where families already talk about the week ahead, so a dry erase calendar right there makes planning feel natural instead of like a chore.
Make it work: Pick a frame that matches your table or chairs so it looks like part of the room. Hang the marker holder within arm’s reach of a seat so nobody has to get up to add a plan.
11. Keep a Desk Size Calendar Within Reach

Not every calendar needs a whole wall. This small white dry erase calendar stands on a slim gold stand on a wooden desk, beside a laptop, a white mug of coffee and a single peach rose in a white vase. Blue pens, a notebook with a lilac pen and a fabric board with pastel sticky notes behind it keep the workspace pretty and practical.
Why it works: It keeps your personal schedule separate from the family board, which suits students, remote workers and anyone juggling their own deadlines.
Make it work: Use fine tip markers, because standard chisel tips fill small squares too fast. Keep it on the side of your desk you look at most, usually next to your screen.
12. Light Up a Calendar in a Teen Room

Teens often ignore family calendars but happily use one that feels like theirs. A rounded wood framed board hangs on a warm terracotta wall, with plans in coral marker and a string of fairy lights looping around it. Polaroid photos are clipped to the wall nearby, while a white desk below holds a laptop, books, a pen cup and a white lamp, with a rattan chair tucked in.
Why it works: Making it part of their own decor gives teens ownership, so exam dates, practices and plans actually get written down.
Make it work: Let them choose the frame and marker colors. Ask them to add every test and due date the day they hear about it, so there are no last minute surprises.
13. Track Bills and Due Dates on a Budget Board
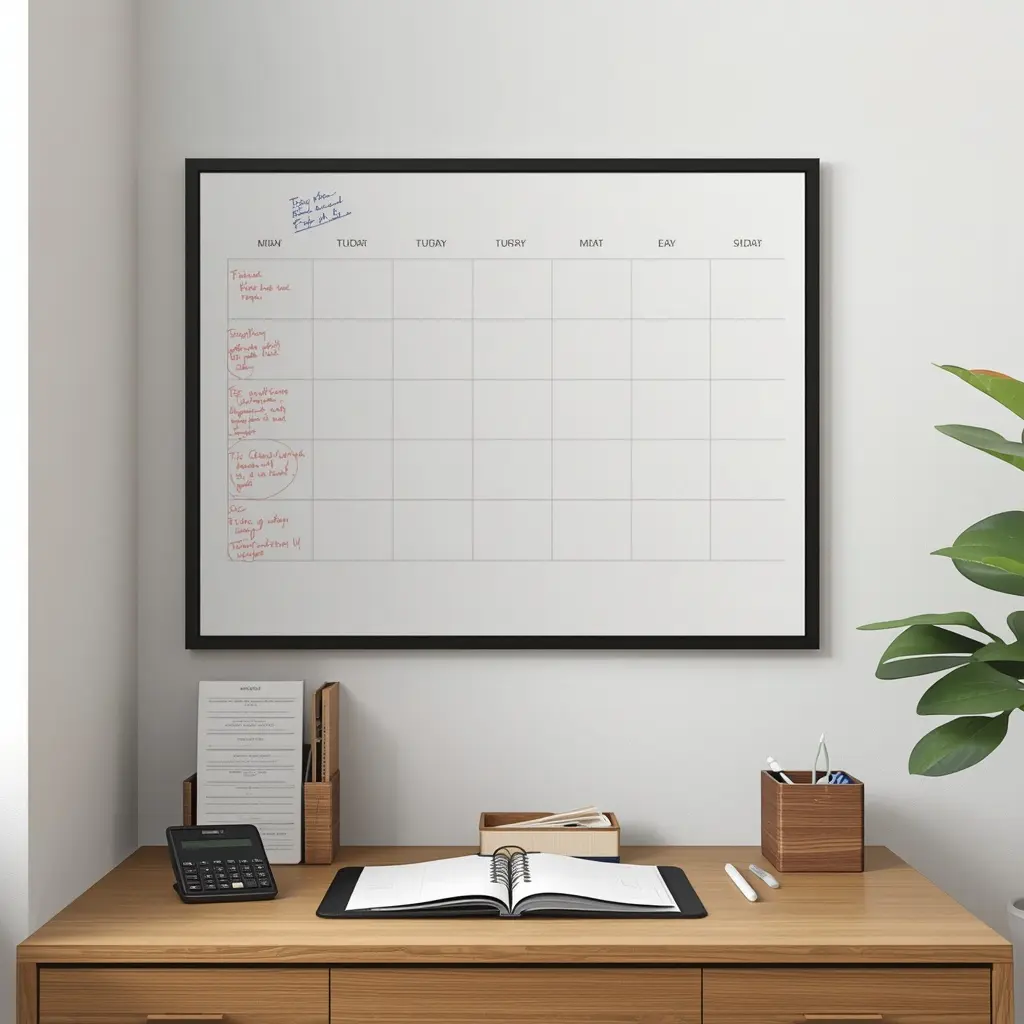
Late fees rarely come from a lack of money. They come from forgetting. In this home office corner, a black framed monthly board has short notes in red marker down the first column, with key items circled. A wooden desk below holds a calculator, a paper organizer, an open spiral planner and a wooden pen cup, while a leafy plant adds a fresh touch.
Why it works: Seeing every due date in one place at the start of the month means bills get paid on time and nothing sneaks up on you.
Make it work: Write only the bill name and due date, and tick it off once paid. Use one color, like red, for anything due in the next seven days so urgent items stand out.
14. Count Down to Birthdays With Washi Tape
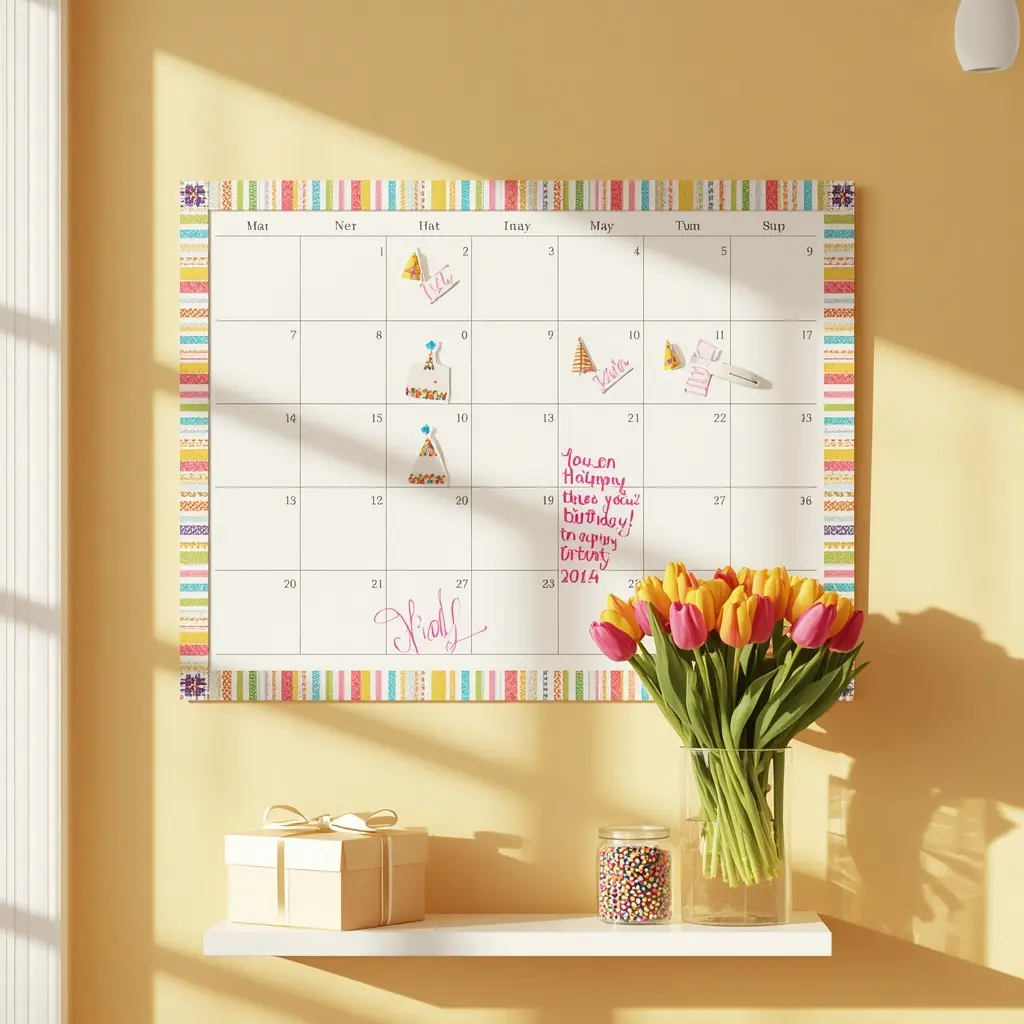
Birthdays and holidays deserve to jump off the board. Here, colorful striped washi tape frames a white monthly dry erase calendar on a sunny yellow wall, and little paper party hats mark the big days, with birthday notes in bright pink marker. A white floating shelf below holds a gift box tied with ribbon, a jar of colorful candy and a glass vase of pink and yellow tulips.
Why it works: The bright border makes the board feel cheerful, and kids love counting down the squares to the next celebration, so nobody forgets a card again.
Make it work: Stick washi tape only on the frame or edges, never across the writing squares, so the board still wipes clean each month. Swap the tape colors to match each season or holiday.
15. Paint a Dry Erase Wall for a Giant Family Planner

For a big, busy family, even the largest board can feel cramped. Here, a huge monthly grid made with thin black lines covers a bright white wall, with a tall blank white list board beside it for notes and shopping. A long rustic wooden dining table sits in front with a cup of pencils at one end, while a small potted plant rests on the windowsill and soft daylight fills the room.
Why it works: There is room for every person’s plans plus a running list, so nothing gets squeezed into the corners or forgotten.
Make it work: Roll on clear or white dry erase paint, then add the grid with thin vinyl tape once the paint has fully cured. Wait the full cure time on the can before writing, because using it too early leads to ghost marks.
The Part Most Calendar Guides Skip
Why does my dry erase calendar get ghost marks?
Ghosting is the faint shadow left when ink sits on a board too long. Wipe the whole board once a week, even the squares you are keeping, and lift stubborn marks with a little isopropyl alcohol on a soft cloth. Ever Whiteboards has a helpful guide to cleaning dry erase surfaces and removing ghost marks.
Is it safe to write personal details on a family calendar?
Keep it simple. Write first names, times and places, but never account numbers, passwords or door codes, and avoid hanging a calendar where it can be read through a front window. Guests, delivery drivers and tradespeople can see whatever is on the wall.
Dry Erase Calendar FAQs
What size dry erase calendar should I get?
For one person, a desk size or 12 by 16 inch dry erase calendar is plenty. For a family of four or more, choose at least 24 by 36 inches so every square has room for a few lines.
Is glass, acrylic or a regular whiteboard best?
Glass resists ghosting and staining the most. Acrylic looks light and modern but scratches easily, so clean it with a soft microfiber cloth. Standard melamine whiteboards cost the least but stain faster over time.
How do I get my family to actually use it?
Hang it where everyone passes daily, keep the markers attached, and spend five minutes every Sunday filling in the week together. Once people see their plans on the wall, they start adding their own.
Final Thoughts on Dry Erase Calendar Ideas
A busy home does not need a complicated system. It needs one clear plan in a place everyone actually looks. Pick the dry erase calendar idea that fixes your biggest problem, whether that is dinner, chores, bills or a family running in five directions. Hang it where people pass every day, choose a few marker colors and give it a quick update every Sunday. Within a month, the whole house will feel calmer.
Save these dry erase calendar ideas to your Pinterest board for your next monthly reset.
Read Next
- Closet Inspo Ideas for Small Closets: 10 Smart Storage Looks: simple storage setups that make a small closet feel twice as big.
- 10 Stunning Coffee Bar Ideas for a Cozy Home Coffee Station: tidy little stations that keep morning clutter off the counter.
- 7 Cozy Fall Simmer Pot Recipes That Make Your Home Smell Like Heaven: easy stovetop scents to make an organized home feel cozy too.

2 thoughts on “15 Dry Erase Calendar Ideas to Keep Your Home Organized Every Month”